Sumomo
Chobits
Chobits

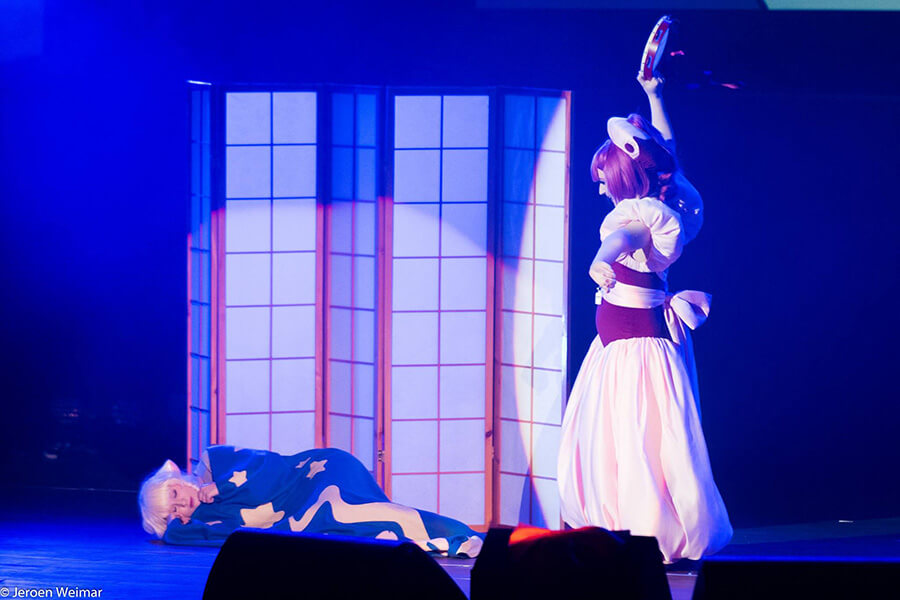
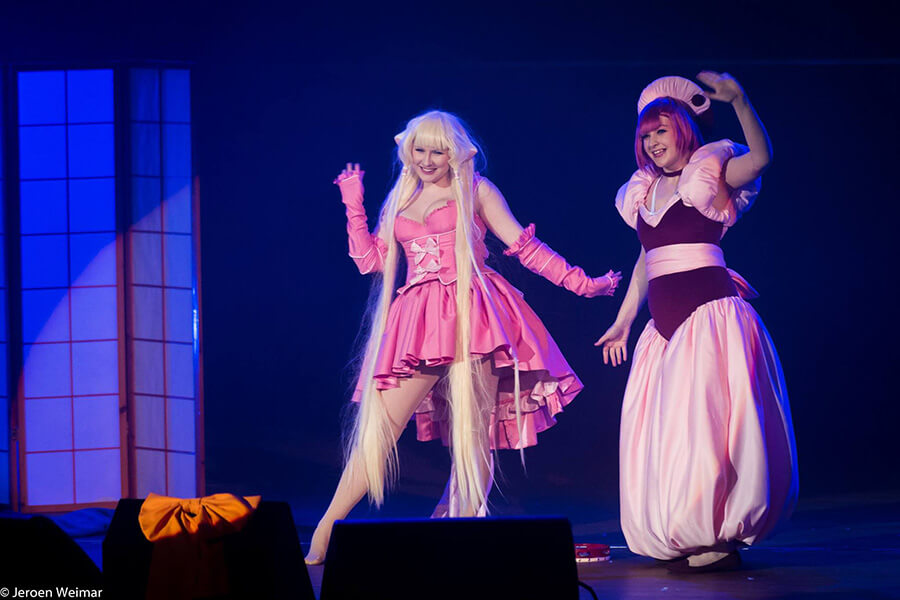
Sumomo was my finals costume for Clara Cow’s Cosplay Cup 2016 with PopcornKuma as Chii!
We wanted to represent another classic anime series for the finals, after qualifying with Cardcaptor Sakura. We brainstormed a few options before settling on Chobits and building a performance around “wakey exercises”! For me, the performance was roughly two minutes of bouncing around looking totally ridiculous.. nothing new there!
Her design is simple to look at and there aren’t many elements to it, but patterning it was tricky. Converting doll proportions to fit me was a big task, and of course it needed crazy volume too!
Materials Used:


Cosplayers Featured:
Construction Notes:
Chobits was one of the first series myself and PopcornKuma came up with when considering options for Clara Cow’s Cosplay Cup. We wanted to make costumes we’d enjoy bringing to life instead of making something complex for the sake of it.
At the time we lived on opposite ends of the country, so we had to work on each costume independently. Because of this, Chii and Sumomo were ideal – none of our costume patterning had to mirror, only our fabrics.
We decided to tweak the colours to make them look better in real life; I went for baby pink and burgundy instead of white and hot pink, as suggested by most of the manga references. Most references are old and inconsistent anyway, so I decided to make something I liked rather than something that was ugly but accurate.
I used lightweight satin for the bulk of the costume and two-way stretch velveteen for the bodysuit, with lots of wadding to create the exaggerated shapes. Over 15 metres of pink satin was used on this costume.
For such a simple costume, Sumomo was complex to design! I spent around 3 months working on her on and off. If you are interested in how she was made, I suggest checking the photos in the Construction Gallery!
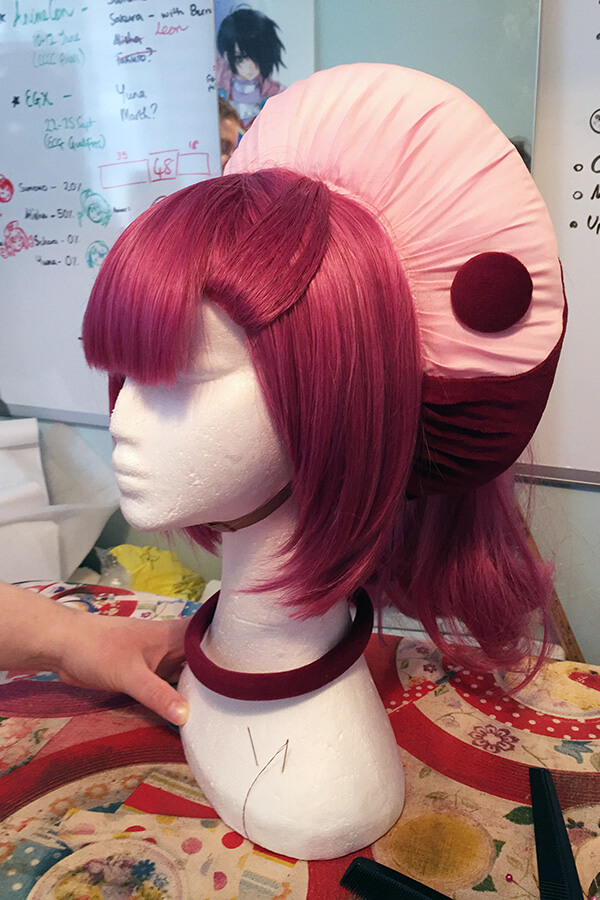
The wig is a Katinka & Ponytail Wrap in Magenta from Arda Wigs. The front of the wig was trimmed to frame the face and to have her blunt fringe. Small sections on either side of the forehead were sectioned off and had lace panels added. Each panel is roughly 3cm wide, pulled back and secured under the hat. My sister gave me a lot of help with the fiddly lacing!
The ponytail wrap is sewn to the back of the hat. The curl is very natural and softer than her exaggerated drill curl.
The hat is made from Fosshape, a heat-mouldable material designed for millinery use. Two large discs were shaped over a curved base, sewn together and covered with batting, matching satin and velveteen details. For a seamless look, I used bondaweb to apply the designs so no stitching is visible.
Once the hat was finished it was handsewn to the wig on my head to ensure it would fit comfortably and not budge too much while performing!
The collar is made from black worbla covered with stretch velveteen, secured with a hook and eye at the back. I rolled it into a curve to make it look 3D.
The bodysuit, sleeves and legs are sewn together as one big piece. This made it much more comfortable to wear and easier to pattern; once it’s on, nothing can sag or move. The waist sash is worn on top of these to complete the costume.
The bodysuit is made from burgundy stretch velveteen. It has two-way stretch, fitting horizontally across the bust so it can’t collapse or slip. It is lined with the same material to reduce visible seam lines and for comfort. Sumomo is small and looks like a child, so the extra layer also helps to flatten my bust and even my hips.
The top edge is finished with pink satin, handsewn in place. It was tricky attaching a non-stretch fabric smoothly to the bodysuit but I was determined to make everything match!
The sleeves are attached to the top of the bodysuit. They were designed to add structure to the costume and are made in 4 parts; a strap, inner sleeve, outer sleeve & wadding. The strap and inner sleeve are hidden but ensure the bodysuit stays straight and firm, disguised by the volume of the outer sleeve and wadding inside.
The strap holds everything up. The outer sleeve and wadding are the same size, gathered to fit to the lining. The shape is adapted from a basic puff sleeve pattern, extended to roughly 65cm wide and gathered by hand to create extra volume and the puff shape. The lining is around 2/3 of the size of the outer sleeve so it is still gathered, but works more like a puffball.
Once the sleeves were gathered together, they were sewn to the bodysuit and reinforced by machine. There is a collage of how the sleeves fit together in the Construction Gallery!
The legs were made in a similar way to the sleeves. Sumomo has a visible crotch on the bodysuit, so they were patterned as individual legs rather than as a pair of trousers.
The shape is roughly the same as a sleeve; the middle tapers up towards the hip for a more comfortable fit. The final pattern was made in 3 parts, using roughly 3 metres of fabric for the outer leg, 3 metres of wadding inside, and 2.5 metres of fabric for the lining.
Each layer was gathered to fit comfortably around each leg, handsewn into place then reinforced by machine. My sister kindly handsewed everything into place while I was wearing it to ensure a comfortable fit between the stretchy bodysuit and non-stretch legs. The gather is looser around the inside of the legs to allow plenty of movement.
The satin I chose was very flimsy, so it falls comfortably and moves easily when performing on top of the wadding inside. The lining is around 5cm shorter than the outer layer, which creates a puffball edge at the ankle and hides the inner layer completely when worn.
All of the pieces for the sleeves and legs were gathered as individual layers, which took a long time to do but gave the best result. This way, all of the folds would sit on top of one another and give an extra boost of volume to the costume.
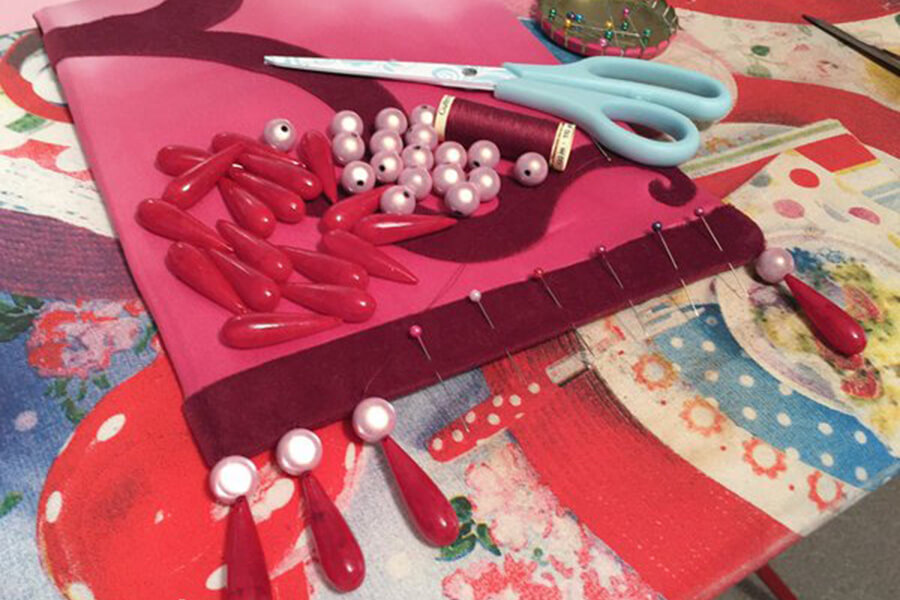
The waist sash is made from the same satin as everything else. It is made from one strip of fabric, roughly 280cm long and 50cm wide, folded in half. Inside of it has a layer of batting which gives it structure and weight when moving, finished with a cute beaded trim. I patterned the length and shape thoroughly and marked it with pins to see where the dye needed to begin first.
The sash has a watercolour style gradient which I attempted with a mix of iDye Poly in Crimson and Pink. I had never used iDye before this project, and ended up dyeing it 3 times to get the right blend and vibrancy, gradually lowering the material in and splashing the dye onto it by hand. Both ends of the sash were dyed, along with a middle section that became the bow tie on the back of the costume.
Once the sash was dyed the patterns were applied the same way as I did for the hat, using bondaweb. The patterns mirror on either side. The sash is sewn as a loop and closes underneath the bow at the back with a hidden hook and bar fixture to ensure the sash will always hang correctly.
The beads were sourced from 2 different suppliers; the teardrops were bought from Yummy Treasures on Etsy, and the light pink round beads are from VJW Jewellery. The teardrop beads were dyed with iDye Poly to match the costume, finished with a coat of clear gloss. Each of the beads were threaded and sewn on by hand. There are 11 sets on the longer side of the sash and 10 on the shorter one, to create the illusion that the longer side is wider.
The shoes are bought. They are almost the exact colour and finish as the velveteen used for the costume, with insoles to reduce slipping.
The tambourine was bought. It was impossible to find a red 6-jingle tambourine, so I ended up painting one and added the ribbon tie. All of the jingles were glued in place for the performance to make sure I could hear the audio properly!
Sumomo was a lot of fun to make. Despite how simple she looks, a lot of time and planning went into this costume!